
Over the past few years, we have seen various ways for executing malicious code.
Lately, we’ve noticed a highly complicated one, which uses many layers of evasion techniques, starting from wrapping internal parts with an NSIS installer, XOR encryption, code injection and even usage of Heaven’s Gate technique. Two of the most known ransomware were currently observed using this technique: Locky and Cerber, both in their new versions.
One of the techniques used with NSIS, is the usage of the “System” plugin, which allows the NSIS installer to call Win32API. This enables the attackers to allocate executable memory, and execute a code stub which in turn, decrypts the actual payload of the ransomware. Thus, hiding its content from security vendors. The fact that everything happens in the memory, makes it even harder to detect.
The ransomware is also using a technique called “Heaven’s Gate” for two main reasons.
It allows to call 64-bit code from a 32-bit process. The ransomware uses this technique to bypass API hooks in ntdll.dll (by security vendors) and use system calls directly instead of going through the standard APIs (which are allowed only through 64 bit). This technique was used several times by Trojans in the wild (one of them is Vawtrak, a banking Trojan – the biggest and most recognized family known to have used Heaven’s Gate).
Second, it is a great way to obfuscate the code. Almost all debuggers seem to be ineffective in dealing with these technique – executing 64-bit code from 32-bit process (only remote kernel debugging using windbg can step through the code). The debuggers do not handle the situation very well since they are designed to handle only one architecture at a time.
To complicate things even further, the ransomware uses a technique called “Process Hollowing” to execute the installer. Process Hollowing is a technique where an attacker creates a new process in a suspended state, and replaces its image with the one that is to be hidden. The installer itself is also encrypted inside NSIS and cannot be traced by security vendors. It is decrypted only at run-time.
The interesting thing with the implementation of this technique is that it is not a typical process hollowing. The ransomware creates a shared section (which contains the ransomware’s installer) between the two processes, and directs the execution of the new process to the new section.
As part of the research we came across several ransomware that use the exact same evasion techniques: both Locky and Cerber (from different versions) reveal the exact same behavior, starting with the usage of NSIS, same NSIS’s script obfuscation, same XOR encryption, decryption of the installer in run-time, usage of Heaven’s Gate technique, and last, the same process hollowing implementation.
NSIS Installer
One of the techniques used in this installation method is the usage of NSIS (Nullsoft Scriptable Install System) installer.
NSIS is a professional open source system used to create Windows Installers. Unlike other systems that can only generate installers based on a list of files and registry keys, NSIS has a powerful scripting language. This script language is designed for installers and has commands that help perform many installation tasks. You can easily add custom logic and handle different upgrades, version checks, and more.
One of the main features of NSIS is the use of plugins, which extends NSIS abilities. They can be written in C, C++, Delphi or another language and can be used to perform installation tasks or extend the installer interface.
One of the plugins that Cerber and Locky are using is the “System” Plugin, which allows the installer to communicate with the operating system [2] and even to call functions exported by external DLL (and thus allows the installer to call Win32 APIs exported by kernel32.dll).
Locky and Cerber installers are using this advantage. Furthermore, by calling Win32 APIs, they are able to execute a malicious shellcode.
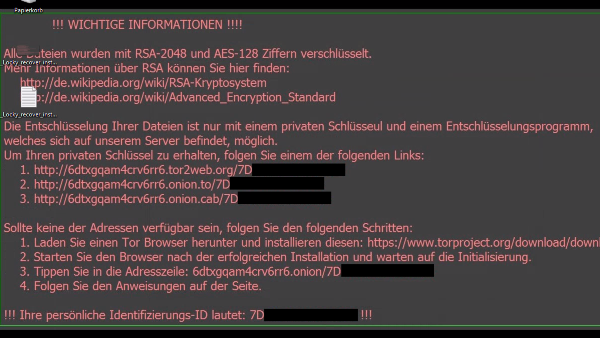
In this report, we have examined the Locky ransomware (SHA256: c976db2208c3fda077da5cd51355f958417b7d3d180a817aaeb7a62acf9faf83). Please note that everything explained here applies to other versions of Locky and Cerber.
Referenced IoC are mentioned at the end of the article.
NSIS Installer structure
NSIS installers can be decompressed using 7-Zip. Locky’s NSIS file is fairly simple and contains the following files and directories:
– [NSIS].nsi – the main script file (clear-text).
– 3FKGytBDrBQsD6lyO3ahoqj.2tiUAHhzBB4k0X – the actual shellcode and the “business logic” of Locky’s execution method. This file also contains encrypted content (which will be explained in-depth later in this article).
– $PLUGINSDIR – the directory which contains the plugins the installer is using.g.
Script Analysis
As mentioned earlier, NSIS is a script-based installer, and by using 7-Zip, we were able to open the installer and extract its files, including the actual script, which was used to build the installer.
By looking at the file [NSIS].nsi, we examined the logic behind the installer and were able to see exactly what it is doing.
According to the NSIS documentation, the function “.onInit” is a callback, which is called when the installer has nearly finished initializing, as this is the actual “main” function of the installer.
Taking a look into “.onInit” function on Locky’s installer reveals a simple logic to execute the shellcode.
First, it writes the installation files to the %temp% directory (which is the installation directory),
and by using the “System” plugin (by calling the “CreateFile” function), it opens a handle to the file containing the actual shellcode.
The script author probably wrote this code this way to obfuscate and confuse..
According to NSIS documentation, the result of the function (in this case – the handle) is put to the “r0” variable.
The second step is allocating a memory region using the “VirtualAlloc” function with PAGE_EXECUTE_READWRITE permissions (0x40).
The size of the region is the same size of the file containing the shellcode and the encrypted content (3FKGytBDrBQsD6lyO3ahoqj.2tiUAHhzBB4k0X), which happens to be 120464 bytes. The address of the newly allocated memory Is put inside the “r1” variable.
Third step –read the content of “3FKGytBDrBQsD6lyO3ahoqj.2tiUAHhzBB4k0X” file (with the “r0” handle, as returned from “CreateFile” function) into the newly allocated memory region (“r1” variable, as returned from “VirtualAlloc” function).
Now that the code has everything in place, the forth step is to call the main function of the shellcode and pass “\3FKGytBDrBQsD6lyO3ahoqj.2tiUAHhzBB4k0X” as a parameter. The main shellcode function is in offset 97508 from the beginning of the allocated memory.
The Shellcode
By first looking at the shellcode, we can clearly see that it is obfuscated in some way.
Traversing through the code reveals an interesting way to XOR the code. The shellcode works in a way that each part is in charge on XORing the next part, and the next part is in charge to XOR the next part and so forth. In this specific example, it took 2 cycles of XORing until we reached the actual “business logic” of the execution phase, but other examples were different, some had 7 cycles and some had 5.
XORing Process
This process works in an interesting way. First, it traverses through the XORed content and looks for the byte “0x4E”.
Since the code is XORed, OllyDbg cannot parse the full code and some of it is missing. Once the code increases the index (EBP register) by 1, it jumps back to the actual check for 0x4E.
As soon as the code finds the address containing 0x4E, it is time to search for the XOR keys.
The way the shellcode searches for the XOR keys is fairly simple, yet a bit complicated. The 0x4E is a marker of the next section of code to be “DE-XOR”. Each of this sections has the following header:
The way the shellcode initializes the XOR Keys are simple. It initializes the ESI register to 0, and checks if the result of Value ^ ESI matches the value inside “XOR keys”. As soon as it finds a match, it replaces the content of “XOR Keys” with ESI and now the keys have been initialized.
EAX contains the result of Value ^ ESI, while [EBP+4] is the uninitialized XOR keys. If it did not find a match, it increases ESI by 1. Once the ESI has increased, it makes the XOR action again, and does the comparison again.
As soon as ESI has given the correct value for the comparison to be true, the “XOR Keys” are replaced with ESI.
If, for example ESI = 0xABCDEF12 gives the correct result, the XOR keys will be as follow:
Key1 = AB
Key2 = CD
Key3 = EF
Key4 = 12
Now that we have the XOR keys, loop “Section Size” times from “Code to be DE-XOR” and XOR each byte with its key, respectively:
EDX is our counter. Check that we haven’t passed “Section Size”.
Loop continues and the shellcode XOR the next byte in line.
The CL register contains the current key being used to do the XOR action. If the counter reaches 4, the EBX needs to be set to 0 and the loop has to be done again.
Once the shellcode DE-XOR all the relevant bytes, it jumps to the next section of code.
The entire process takes place again one more time, and afterwards it jumps to the actual business logic of Locky.
Business Logic
Locky and Cerber install themselves using a known method which has many techniques of implementation – Process Hollowing. Digging into the code revealed an interesting implementation for this attack method.
– Getting Kernel32 & NTDLL Imagebase:
Locky and Cerber use a well-known technique to find the base addresses of core libraries.
Since, a shellcode needs to call Win32 APIs – it needs to find their addresses. To do so, the shellcode accesses the PEB (Process Environment Block), which contains a linked list of loaded modules and their base addresses. This specific function receives as an input the library name – and returns the image base of the requested library.
As soon as the code has the image base address of kernel32.dll, it goes through the export table and looks for 22 functions in kernel32, 10 functions in advapi32.dll, and 4 from ntdll.dll.
The way it looks for a specific function’s address is fairly unique – it passes the search function some kind of CRC32 calculation of a string, goes through the export table of the specified DLL and calculates the CRC32 for each of the exported functions. As soon as it has a match to the one it was looking for, the shellcode retrieves the address and stores it (I didn’t go into much details about how they calculate the CRC32, but it looks like it since they are using a CRC32 lookup table with Polynomial value of “0x04C11DB7”). The functions are being searched that way *possibly* to hide which functions they are actually searching for.
– Mapping NTDLL
An interesting thing happening inside the shellcode, is the mapping of ntdll.dll.
First, the code opens a handle to ntdll.dll, allocating enough space using VirtualAlloc (size is the size of ntdll.dll, received by GetFileSize). It then reads the content of ntdll.dll into the newly allocated memory. Please note that even when the path displays “C:\Windows\SYSTEM32” it actually points to “C:\Windows\SysWOW64” since the process is 32-bit.
Second, by hopping over IMAGE_OPTIONAL_HEADER, it goes straight to the sections of ntdll.dll.
Third, allocate enough space to contain the mapped image of ntdll (with size “SizeOfImage” field of ntdll).
Forth, copy the headers (Size of headers is determined by the “SizeOfHeaders” field inside IMAGE_OPTIONAL_HEADER).
Fifth, copy the sections (the number of sections to copy is determined by “NumberOfSections” field inside IMAGE_FILE_HEADER).
As soon as NTDLL is mapped into memory, something interesting happens. The code searches for a specific function’s address (using the CRC32 method described above) inside the mapped ntdll. As soon as it has the function address, the shellcode extracts the system call identifier belonging to that function. To understand this process, we need to understand how system call numbers are set:
Every Nt* function begins with the same opcodes (MOV EAX, IMM32), and the next four bytes determines the system call number. Therefore, we expect the first to be B8h (MOV EAX, IMM32), and the next four – system call number. This is exactly what happens on the shellcode:
This is probably done to bypass hooking mechanisms of security solutions, evade monitoring and obtaining a basic code obfuscation. The process is fairly simple – instead of using normal high level APIs, registers need to be set up and call sysenter / syscall (sysenter – x32 architecture, syscall – x64 architecture).
The problem with system calls is that they vary between Windows versions and there is no API to obtain a system call number. But this is achievable to do it on runtime using ntdll.dll. Let’s dig more to understand what exactly is happening using the extracted system call number.
– Heaven’s Gate
As soon as the shellcode retrieves the system call number, it uses a technique called “Heaven’s Gate” to execute 64-bit code from a 32-bit process.
Every process (either 64-bit or 32-bit) executed on Windows 64-bit is first executed as 64-bit. The first code to execute is the 64-bit ntdll, which is in charge of initializing the process (as 64-bit process, even if the process is 32-bit). Only later WoW64 (Windows-On-Windows) takes over, loads the 32-bit version of ntdll.dll and execution begins through a far jump to a computability code segment. It cannot back to 64-bit world, only in the case of system calls. The 32-bit ntdll.dll that was loaded contains a series of instructions to jump back into 64-bit mode (instead of SYSCALL instruction which exists in 64-bit ntdll.dll) so the SYSCALL instruction can be issued.
Basically, WOW64 is composed of a full set of 32-bit stub libraries that make the app run smoothly while it manages the switch between 32-bit and 64-bit code.
Heaven’s Gate is a really simple way to transition between 32-bit and 64-bit code. For every process running on 64-bit Windows, two code segments are allocated.
Code segment 0x23 -> x86 mode
Code segment 0x33 -> x64 mode
This is also what being used on the shellcode. Once it receives the required system call number, it is time to switch to x64 mode to execute a SYSCALL command.
Inside the 64-bit code, we can see a SYSCALL.
Basically, the shellcode uses a SYSCALL to bypass hooking mechanism and to make the code harder to debug, since almost all debuggers seem to be ineffective in dealing with these jumps (only remote kernel debugging using windbg can step through the code).
Also, the debuggers do not handle the situation very well since debuggers are designed to handle only one architecture at a time.
– Process Hollowing
The shellcode tries to achieve several purposes using Heaven’s Gate:
– Decrypt the PE which will be used as the code to be executed inside the process host
Remember the file “3FKGytBDrBQsD6lyO3ahoqj.2tiUAHhzBB4k0X” which NSIS wrote to temp? Time to use it. A handle is opened to the file.
As soon as it has a handle, it allocates space and reads the whole content of the file into the newly allocated memory. It then allocates another memory region, where the size is extracted from “3FKGytBDrBQsD6lyO3ahoqj.2tiUAHhzBB4k0X” at offset 0x5C.
As soon as allocation is complete – it copies the content from offset 0x64 of “3FKGytBDrBQsD6lyO3ahoqj.2tiUAHhzBB4k0X” to the newly allocated memory (size to copy is the size extracted previously). Now that we have the content, it is time to decrypt!
And this is where the magic happens. The encryption key is the filename of the main file it previously extracted (“3FKGytBDrBQsD6lyO3ahoqj.2tiUAHhzBB4k0X”).
A WILD non-valid PE APPEARS!
This buffer is compressed, so it needs to decompress it. This is why it allocates a new memory region (the size of the uncompressed buffer is also extracted from the file), and calls RtlDecompressBuffer
0x102 is the compression format. It stands for 0x100 | 0x2 0x100 where 0x100 is the maximum compression level, and 0x02 is LZNT1 compression algorithm.
A wild valid PE appears!
Apparently, the file is a known variant of Locky (SHA256: 31af9ea19741da26235b9f6e253da5112d27260545cf3034bd12ff36a8b65dad)
Now that the shellcode has everything it needs. What’s next?
The shellcode executes the same process it is running from (for example, if the code runs from calc.exe, it executes calc.exe again) in a SUSPENDED_STATE. A strong indication for process hollowing.
The following step is to get the main thread context, to direct execution afterward.
– Replacing the content of the suspended process
What interesting in this case is that it is not a typical process hollowing.
In order to replace the content of the suspended process, the code is mapping ntdll.dll again and using the search mechanism (CRC32), searching for the system call number of “NtReadVirtualMemory”, which is equivalent to the Win32API “ReadProcessMemory” and it is used to determine the base address of the destination image.
Once it got the base address, it searches again, but this time for the system call number of “NtCreateSection” and creates a section with ACCESS_MASK of SECTION_MAP_WRITE | SECTION_MAP_READ | SECTION_MAP_EXECUTE.
Now that the code has created the section, it searches for the system call number of “NtMapViewOfSection” in order to map the section created previously into the suspended process (I know this since the process handle is passed to NtMapViewOfSection).
Itis doing this action again, but this time it is mapping the section to its own address space (since the process handle is -1). This means that the section is shared between processes.
The next step is to map the decrypted PE (Locky’s Image decrypted earlier) to the section. It is done exactly the same as it mapped ntdll.dll – parse Locky’s image, and copy the headers and sections.
Now the section is shared between the two processes and contains Locky’s PE. It now searches for the system call number of “NtWriteVirtualMemory” which is the equivalent of Win32API “WriteProcessMemory”. With this function, the code replaces the ImageBaseAddress in the suspended process to Locky’s PE ImageBase.
From the picture above, we can see the Thread Information Block of the suspended process (the right window). We can see that offset 30h points to the PEB (Process Environment Block) of the suspended process. The parameter passed to NtWriteVirtualMemory (equivalent of “WriteProcessMemory”) is the address of PEB+8h (+8h is the offset to PEB.ImageBaseAddress).
Now that everything is in place, it is time to change the EAX inside the CONTEXT structure (CONTEXT was extracted previously using GetThreadContext) using SetThreadContext.
[EBP-4C0] now contains the EntryPoint of Locky’s Image
Note that the address 0x1C0000 is the offset returned from NtMapViewOfSection, when the code mapped the section to the suspended process. So basically, 0x1C0000 is the offset of the shared section inside the suspended process.
The final step: search for the system call number of “NtResumeThread” using the same search mechanism explained above.
As soon as the code gets the system call number for resume thread, it just calls it using SYSCALL and Locky’s file begins to execute while encrypting the entire file system of the computer.
– Similarities Between Cerber and Locky
When inspecting Cerber (SHA256: dbd21df0f96f870875e4abafaa33b595df9e4da8b39ccc6c717fea9afcaedef3), we noticed that both versions contains similar behaviors.
First, the recent Cerber variants also start from NSIS installers, having the same structure of files.
The script ([NSIS].nsi) is the same:
Digging into the code being executed looks exactly the same. The same XOR process happens here as well, searching for the byte marker of the section to be DE-XOR.
Unlike the previous example (0x4E), this time itis 0xED.
XORing process is also the same (see above for example how the process works) – XOR ESI with EAX to find the 4 keys.
As soon as the code finishes to XOR everything, we can see the same search mechanism using CRC32 for system call numbers.
As soon as the code retrieves the system call number, Heaven’s Gate technique is used here as well.
The technique for process hollowing is also the same as above:
– Create its own image as a new process in suspended state
– Get CONTEXT using GetThreadContext
– Create a section
– Map section to both suspended process and its own process (so section is shared between them) using NtMapViewOfSection system call number.
– Decrypt Cerber’s PE and map it to the section (Encryption key is also its file name – “zXoueT8m.cdhNtye”).
– Fix suspended process ImageBaseAddress inside PEB to Cerber’s ImageBase.
– Change CONTEXT.EAX (which contains the entrypoint) to Cerber’s EntryPoint
– ResumeThread
NSIS Extractor
We wrote a tool using C and Python to extract the actual ransomware binary file from a given NSIS installer. The source code can be found in our GitHub.
Leveraging ai deep learning in combination with strong research capabilities, enables Deep Instinct to offer unmatched detection of new malware variants, providing powerful protection on endpoints and mobile devices.
IoC
Locky OSIRIS
c976db2208c3fda077da5cd51355f958417b7d3d180a817aaeb7a62acf9faf83
da1469e08123a829e5d33d0e51632953c3e0b36abec90cfe8ff5cb812f9d56e9
Cerber 5.0.1
993ee9f39003c5221f270846c0df668b4b3258e6f72ad6cc3c1f3e14c5f16ae9
dbd21df0f96f870875e4abafaa33b595df9e4da8b39ccc6c717fea9afcaedef3
Cerber 4.1.1
29744b8bab2f176444a8d614bfb96de05803585be50ebc9fa62bc2a027db96a3
Other versions of Cerber:
c27db0c832d5821454d1881d323a6745e8356fd531e7565809bc6cd99af6d682
0635dedd5b1e4b21e1324828608973926417e3b53900a7a8dc8ef8f0c068df2b
45ee98554aa6ea466a17609740f6e2f8dc4de11ebce3c3eb72d73c4fcbb16d1e
39a1eeda1f5c252a2daaa60609bb151bcdbe35ec753d7daad1904152509cf49
Dumped original version of Locky:
31af9ea19741da26235b9f6e253da5112d27260545cf3034bd12ff36a8b65dad
To learn about the different Ransomware variants, download this free guide >>